Connect your wallet
Link your wallet to the Xferchain.
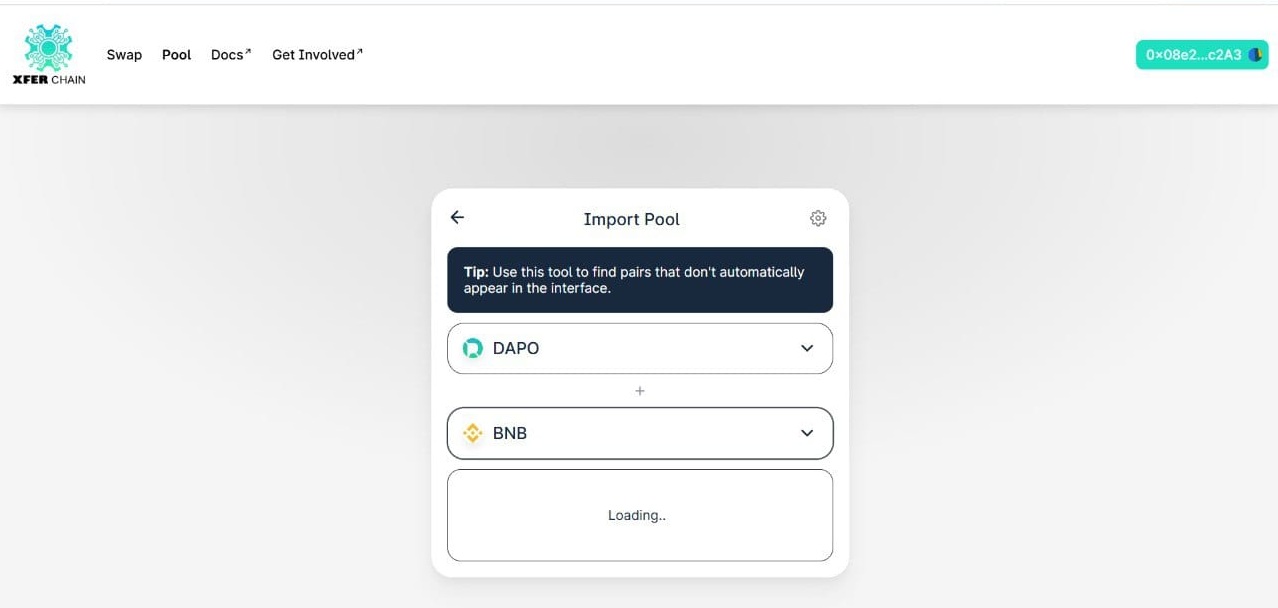
Select Tokens
Choose tokens (like DAPO/USDT) to swap or add.
Swap Tokens
Enter amount and confirm the swap.
Confirm Transaction
Monitor the trade on the blockchain.
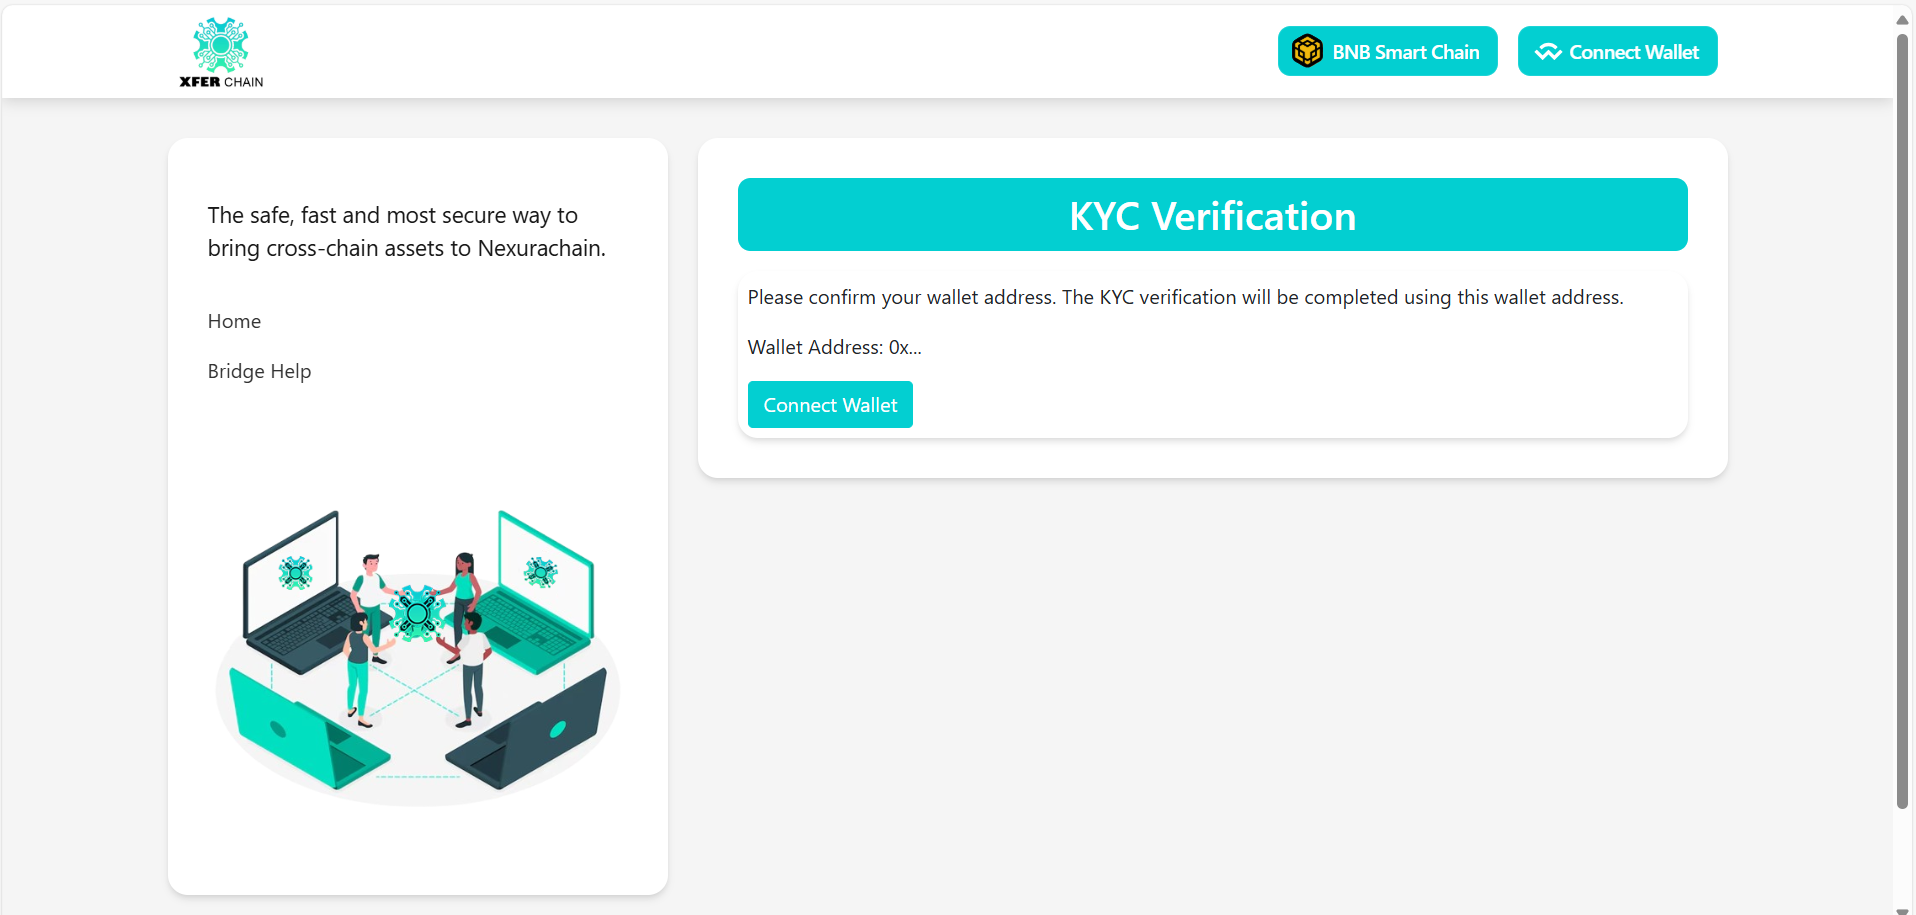
Note: Make sure your KYC is done. KYC means proving who you are. If not, go to this website to do KYC.
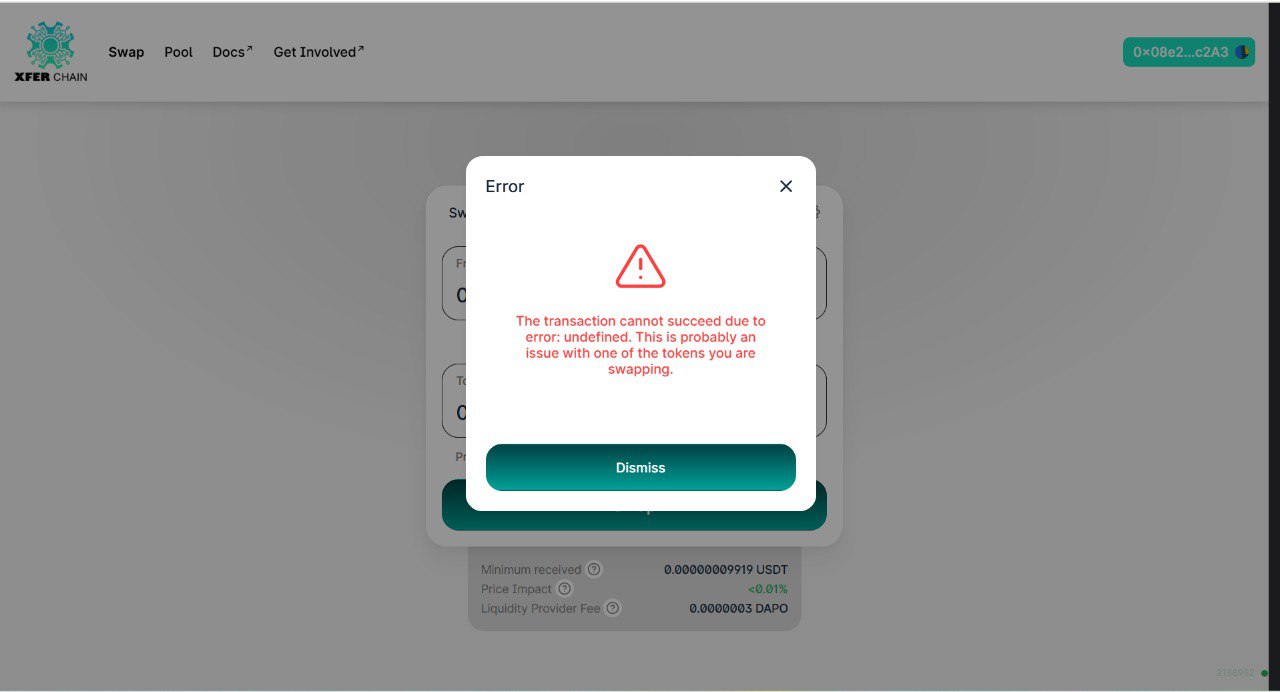
Without KYC, you can’t swap or add coins and might see errors like this:
Swap Coins
Step 1: Open And Connect Your Wallet
1. Make sure the MetaMask extension is already installed and set up in your browser.
2. Go to this website.
3. The MetaMask extension should open automatically. If it doesn’t, try refreshing the page or click the “Connect Wallet” button located at the top right corner.

4. Choose your wallet (MetaMask, WalletConnect, etc.) and approve the connection..
5. Once connected, your wallet address will appear, and you can begin trading.
Check: Your wallet address (e.g., 0x123...) should now appear on the website. If it doesn’t, refresh the page and try again.

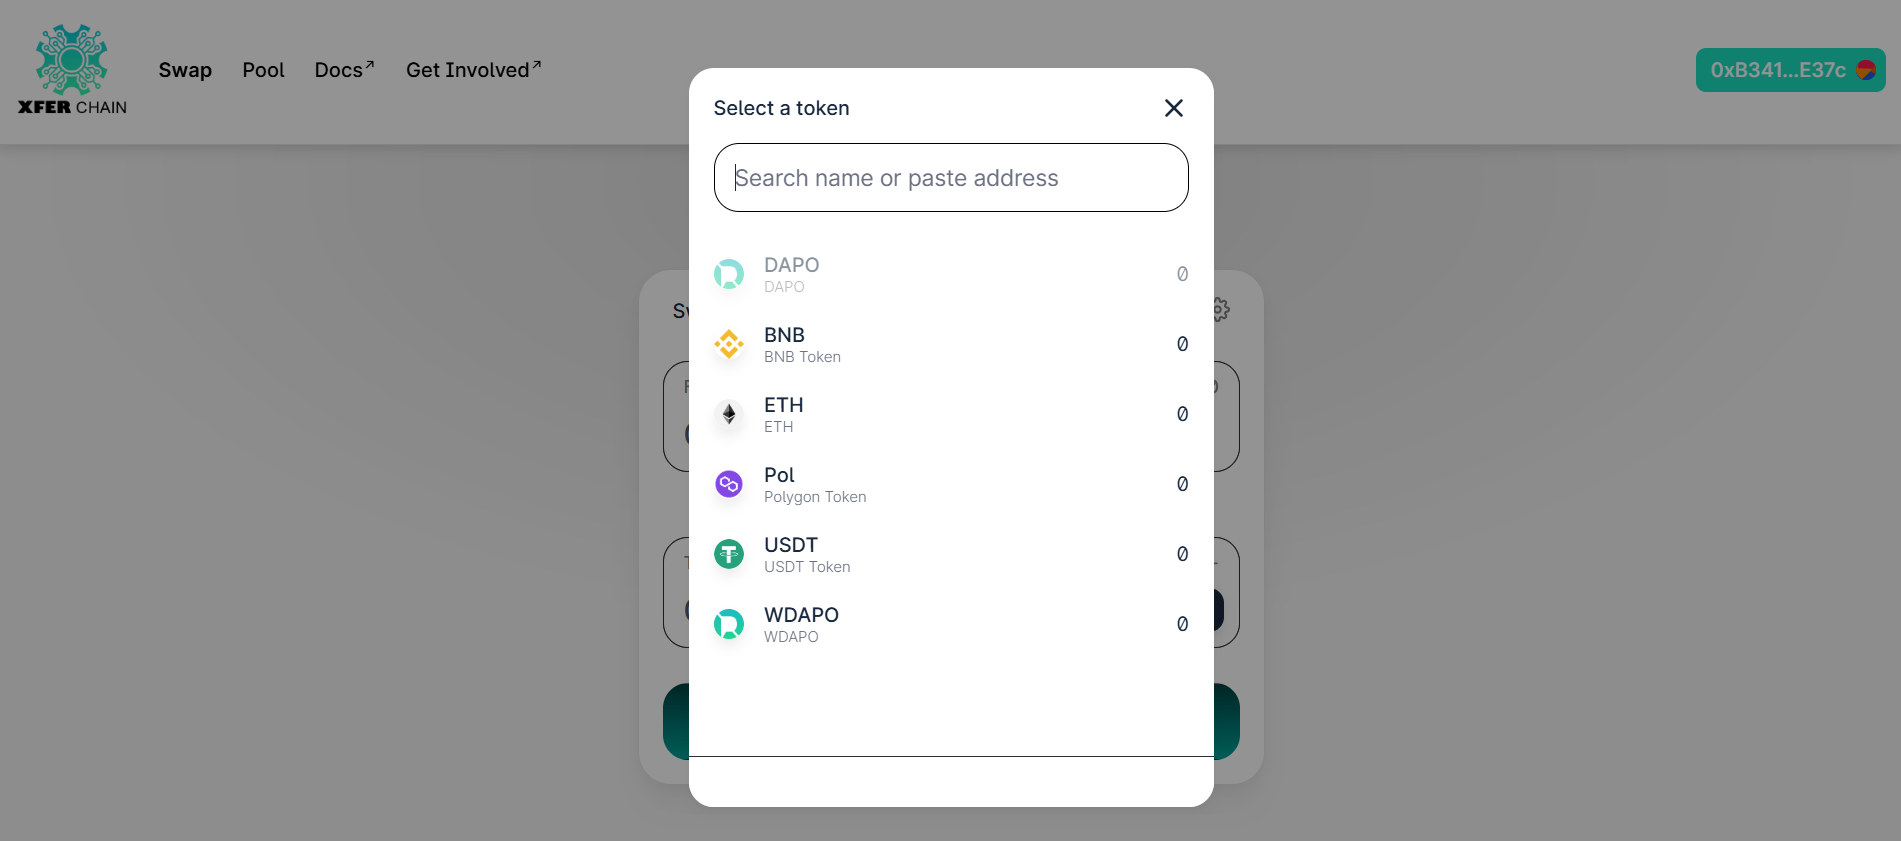
Step 2: Select Tokens to Swap
1. Find the swap box on the website.
2. Click the top box and pick a token you have, like DAPO.
3. Click the bottom box and pick a token you want, like USDT.
Check: Make sure both token show in the swap box. If not, try picking again.
Step 3: Enter Amount
1. In the top box, type how many tokens you want to trade.
2. The bottom box will show how many tokens you’ll get (based on current pool reserves or rates).
Check: Look at the bottom box to see if the amount looks right. If not, type a different amount.

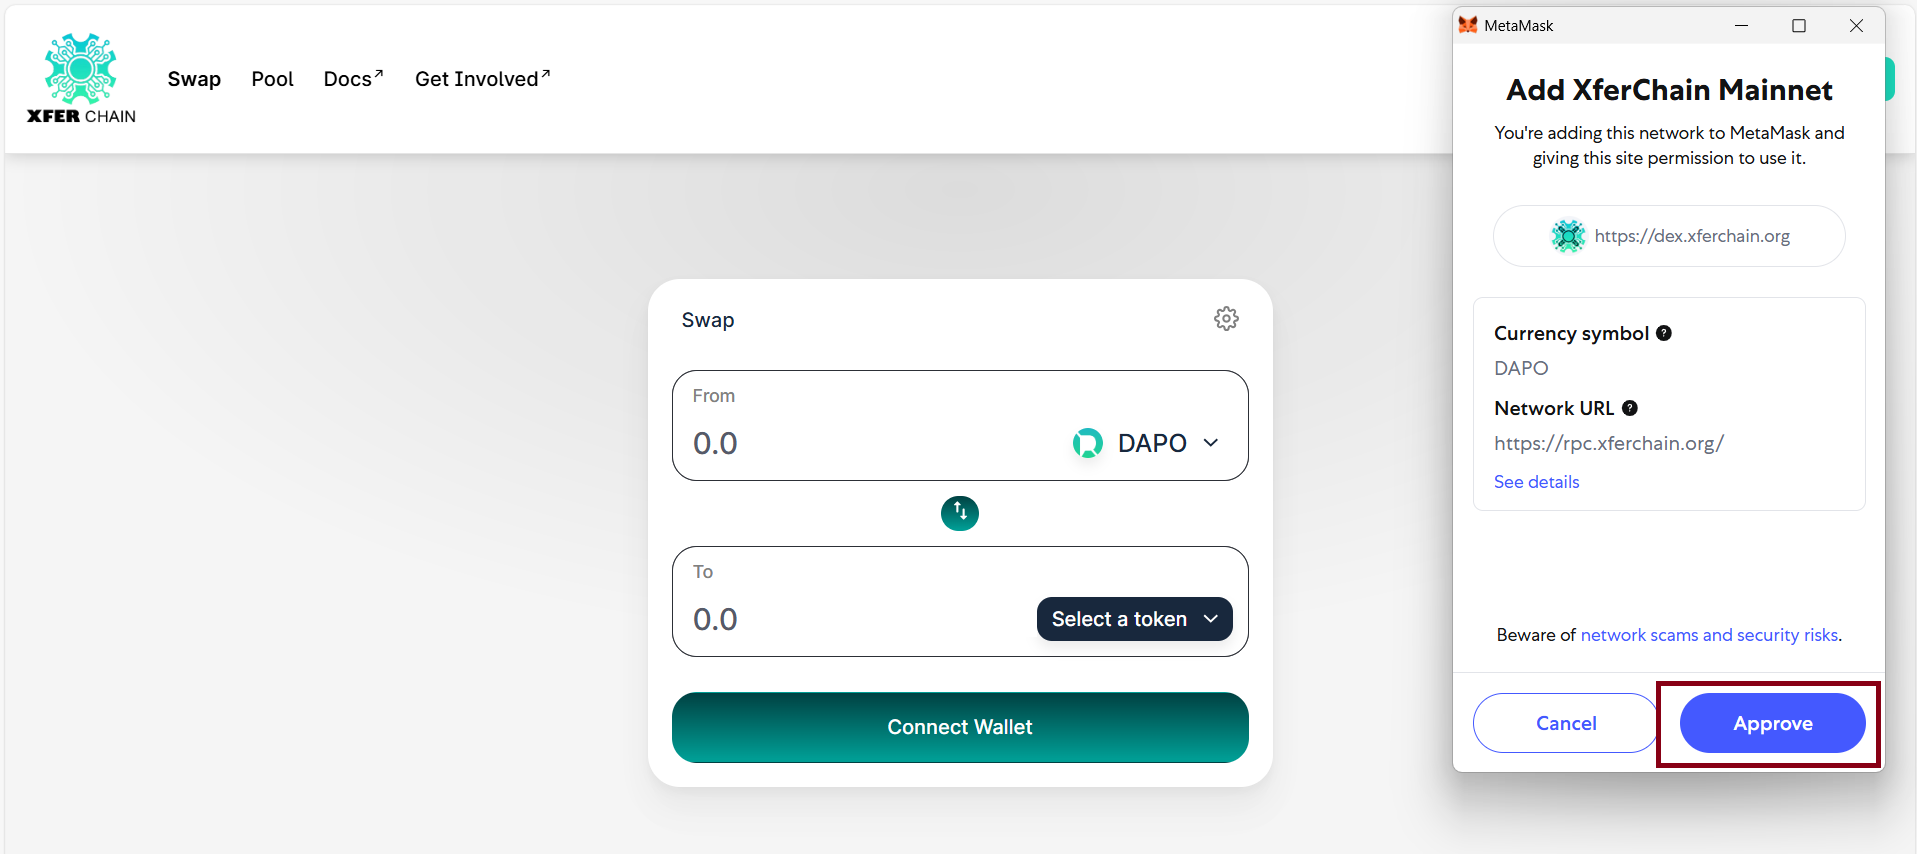
Step 4: Approve the Token (if required)
1. If it’s your first time, click “Approve”.
2. MetaMask will pop up. Click “Confirm”.
Check: Wait until MetaMask says it’s done. If it doesn’t pop up, click “Approve” again.
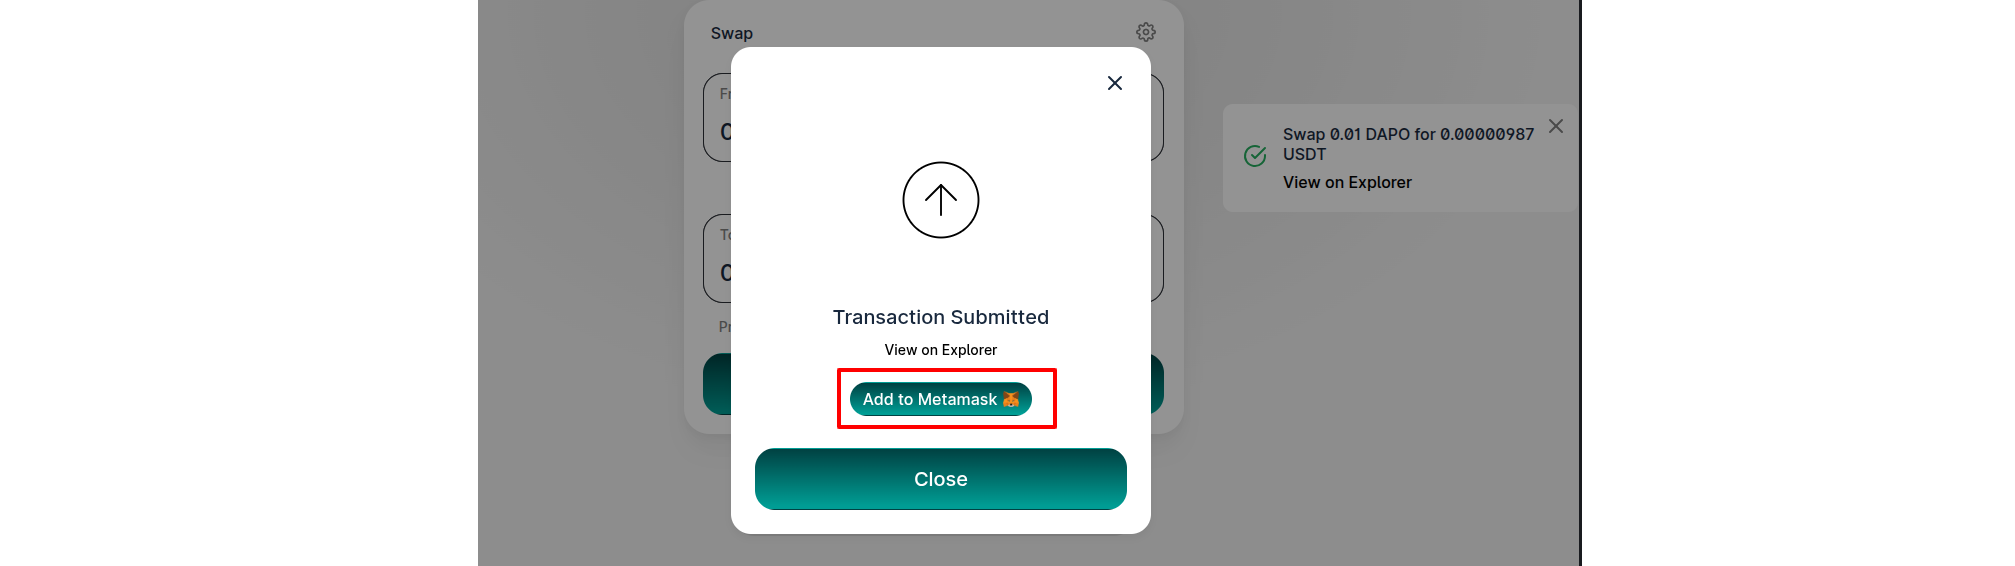
Step 5: Swap Your Tokens
1. Click the “Swap” button.
2. MetaMask will pop up again. Click “Confirm”.
Check: Wait a minute. MetaMask should say the swap is done. If not, try again.

Step 6: Check the Transaction to See Your New Tokens
1. Go to this website.
2. Type your wallet address (like 0x123...) to see your trade.
3. Look in MetaMask to see your new tokens!
Check: Your new tokens should be in MetaMask. If not, check the website again.
Add tokens to a Pool
This helps the DEX work! You add two tokens together to a pool.
Step 1: Go to Add Tokens Page
1. On this website, click “Pool” or “Add Liquidity”.
2. Make sure your wallet is connected (see Step 1 above).
Check: Your wallet address (like 0x123...) should show on the website. If not, connect your wallet again.

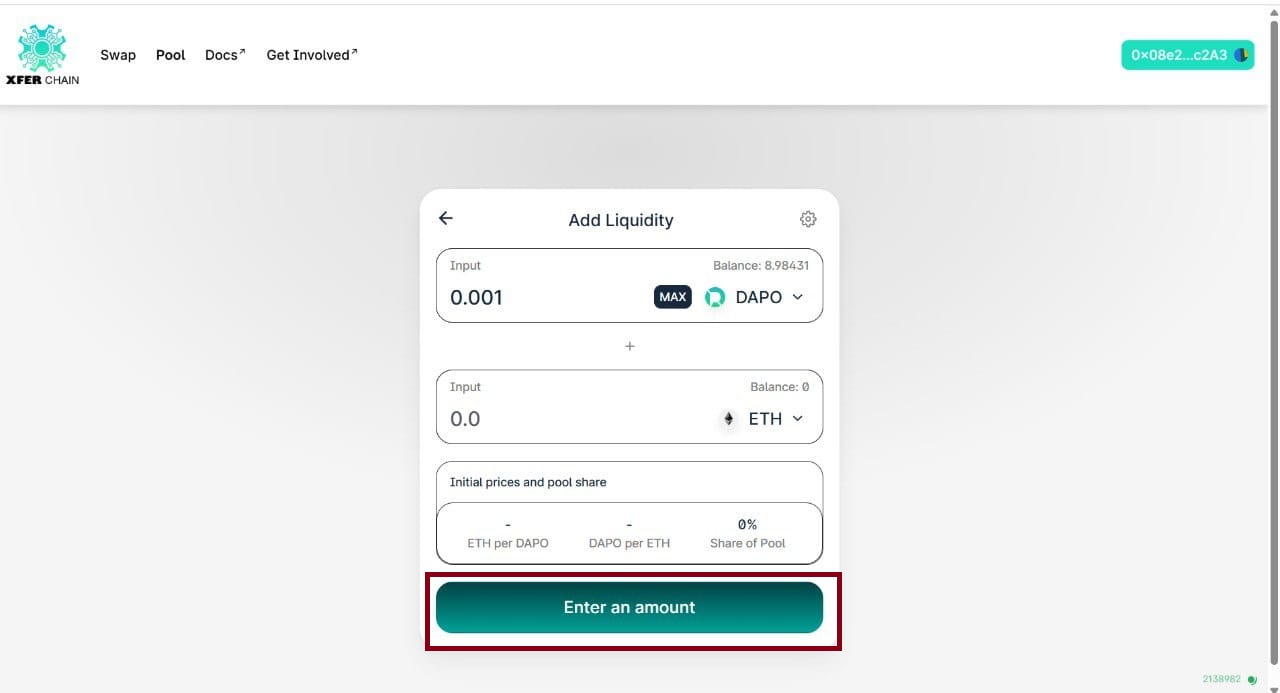
Step 2: Pick Two Tokens
1. Click the first box and pick a token, like DAPO.
2. Click the second box and pick another token, like ETH.
Check: Both tokens should show in the boxes. If not, pick again.
Step 3: Type Tokens Amounts
1. Type how many of the first token you want to add.
2. The website will tell you how many of the second token to add.
Check: Both boxes should show numbers. If not, try typing a different amount.
Step 4: Allow Both Tokens
1. Click “Approve” for the first token. MetaMask will pop up. Click “Confirm”.
2. Do the same for the second token.
Check: Wait until MetaMask says both are done. If MetaMask doesn’t pop up, click “Approve” again.
Step 5: Add Tokens to Pool
1. Click “Add Liquidity” or “Supply”.
2. MetaMask will pop up. Click “Confirm”.
Check: Wait a minute. MetaMask should say it’s done. If not, try again.
Step 6: Check Your Pool Tokens
1. Go to this website.
2. Type your wallet address (like 0x123...) to see your pool addition.
3. Look in MetaMask for new LP tokens.
Check: You should see pool tokens in MetaMask. If not, check the website again.